These steps will explain how to deploy the Sysdig Secure Cloud stack for AWS with Terraform for a single account. It is not within the scope of this workshop to explain how to deploy it in an organization account. To learn more about this, review the docs here.
Requirements
To install the Sysdig Secure for AWS integration:
- Terraform installed in your host (v.3.1+).
- Sysdig Secure SaaS account with administrator permissions.
Install
In the previous step we chosen Terraform installation from the onboarding wizard. (If you skipped the wizard, just log into Sysdig Secure and browse to Integrations > Data Sources > Cloud Accounts, then click on Connect Account > AWS Mark all options Next Mark “Single” Next Terraform ).
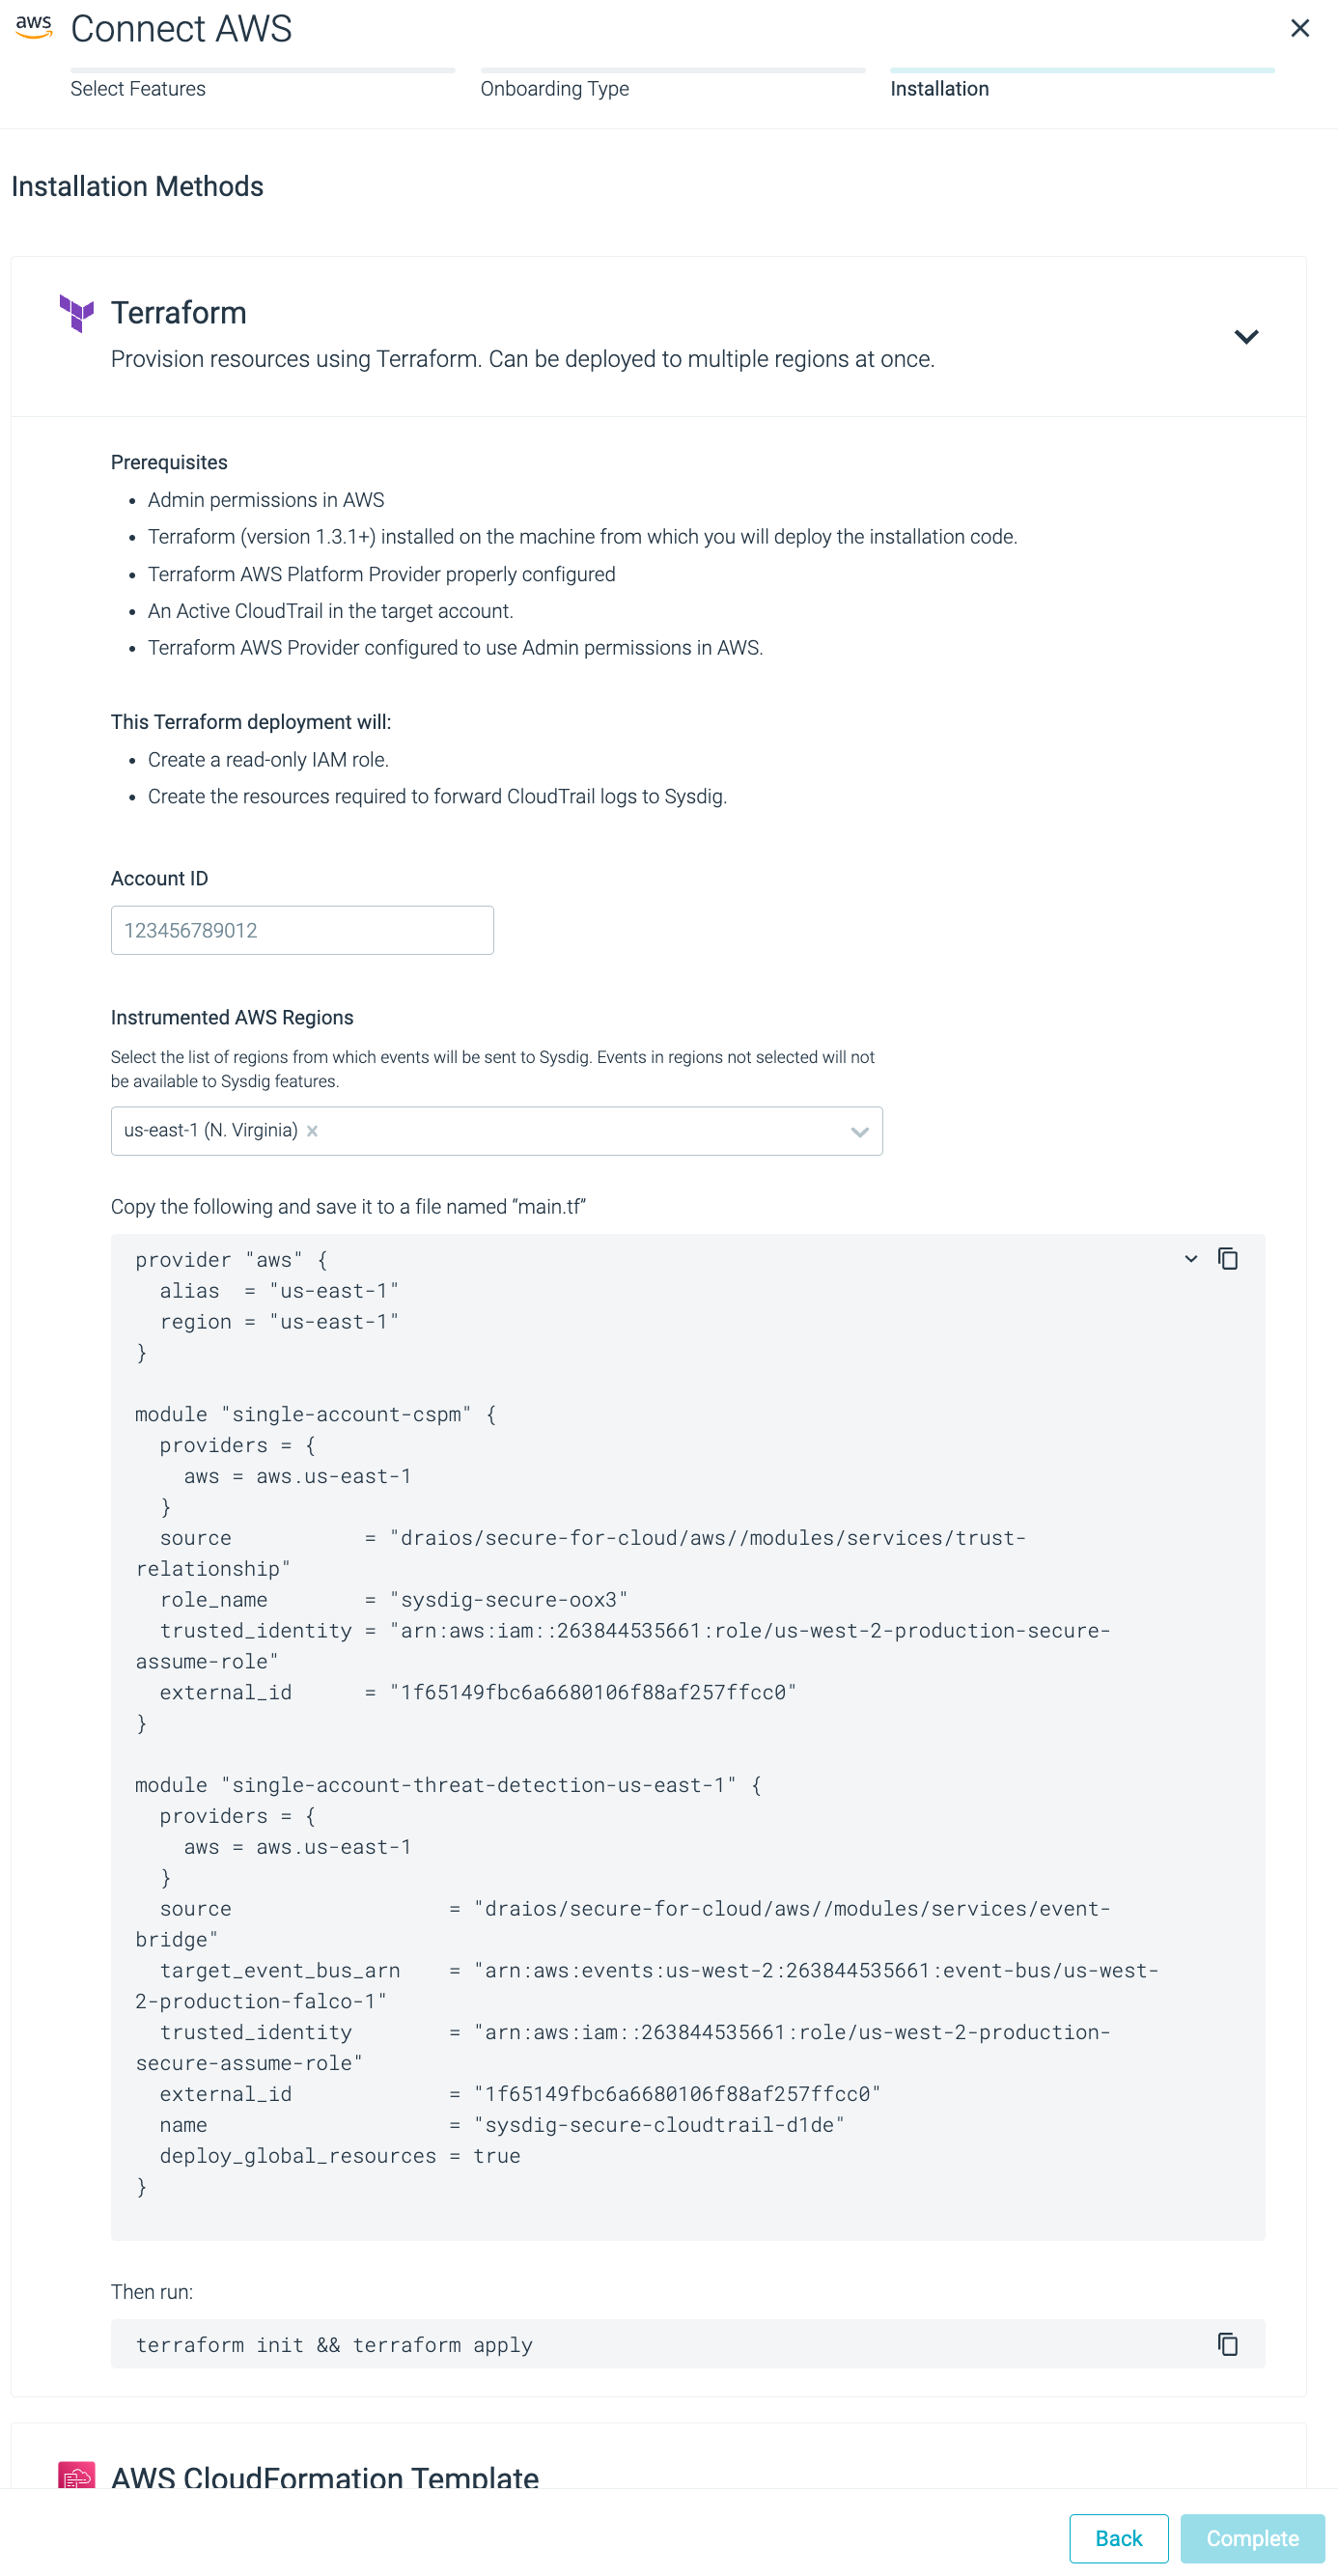
Insert valid AWS Account ID and region (for this workshop, use
us-east-1region) and copy the resulting content from the auto-generated box named “main.tf”.Go to the terminal window and create a folder with the
main.tffile inside. Copy the terraform manifest from the previous step in this file.cd ~ mkdir tf-sysdig-secure-cloud && cd $_ touch main.tfThe final result should look like this:
 1provider "aws" {
 2  alias  = "us-east-1"
 3  region = "us-east-1"
 4}
 5
 6module "single-account-cspm" {
 7  providers = {
 8    aws = aws.us-east-1
 9  }
10  source           = "draios/secure-for-cloud/aws//modules/services/trust-relationship"
11  role_name        = "sysdig-secure-oox3"
12  trusted_identity = "arn:aws:iam::263844535661:role/us-west-2-production-secure-assume-role"
13  external_id      = "1f65149fbc6a6680106f88af257ffcc0"
14}
15
16module "single-account-threat-detection-us-east-1" {
17  providers = {
18    aws = aws.us-east-1
19  }
20  source                  = "draios/secure-for-cloud/aws//modules/services/event-bridge"
21  target_event_bus_arn    = "arn:aws:events:us-west-2:263844535661:event-bus/us-west-2-production-falco-1"
22  trusted_identity        = "arn:aws:iam::263844535661:role/us-west-2-production-secure-assume-role"
23  external_id             = "1f65149fbc6a6680106f88af257ffcc0"
24  name                    = "sysdig-secure-cloudtrail-d1de"
25  deploy_global_resources = true
26}
Now, just initialize and execute Terraform with:
terraform init && \
terraform apply --auto-approve
Wait until the installation finishes. You’ll see the Terraform logs displaying the progress of the install (it should not take more than 2 minutes to deploy):
Initializing modules...
Downloading registry.terraform.io/sysdiglabs/secure-for-cloud/aws 0.10.1 for secure-for-cloud_example_single-account...
- secure-for-cloud_example_single-account in .terraform/modules/secure-for-cloud_example_single-account/examples/single-account
- secure-for-cloud_example_single-account.cloud_bench in .terraform/modules/secure-for-cloud_example_single-account/modules/services/cloud-bench
- secure-for-cloud_example_single-account.cloud_connector in .terraform/modules/secure-for-cloud_example_single-account/modules/services/cloud-connector-ecs
- secure-for-cloud_example_single-account.cloud_connector.cloud_connector_sqs in .terraform/modules/secure-for-cloud_example_single-account/modules/infrastructure/sqs-sns-subscription
- secure-for-cloud_example_single-account.cloudtrail in .terraform/modules/secure-for-cloud_example_single-account/modules/infrastructure/cloudtrail
- secure-for-cloud_example_single-account.codebuild in .terraform/modules/secure-for-cloud_example_single-account/modules/infrastructure/codebuild
- secure-for-cloud_example_single-account.ecs_vpc in .terraform/modules/secure-for-cloud_example_single-account/modules/infrastructure/ecs-vpc
Downloading registry.terraform.io/terraform-aws-modules/vpc/aws 3.16.1 for secure-for-cloud_example_single-account.ecs_vpc.vpc...
- secure-for-cloud_example_single-account.ecs_vpc.vpc in .terraform/modules/secure-for-cloud_example_single-account.ecs_vpc.vpc
- secure-for-cloud_example_single-account.resource_group in .terraform/modules/secure-for-cloud_example_single-account/modules/infrastructure/resource-group
- secure-for-cloud_example_single-account.ssm in .terraform/modules/secure-for-cloud_example_single-account/modules/infrastructure/ssm

Initializing the backend...

Initializing provider plugins...
- Finding hashicorp/aws versions matching ">= 3.50.0, >= 3.62.0, >= 3.73.0, >= 4.0.0"...
- Finding hashicorp/random versions matching ">= 3.1.0"...
- Finding sysdiglabs/sysdig versions matching ">= 0.5.29, >= 0.5.33"...
- Installing sysdiglabs/sysdig v0.5.40...
- Installed sysdiglabs/sysdig v0.5.40 (signed by a HashiCorp partner, key ID 0A2458C5D4F39147)
- Installing hashicorp/aws v4.35.0...
- Installed hashicorp/aws v4.35.0 (signed by HashiCorp)
- Installing hashicorp/random v3.4.3...
- Installed hashicorp/random v3.4.3 (signed by HashiCorp)

Partner and community providers are signed by their developers.
If you'd like to know more about provider signing, you can read about it here:
https://www.terraform.io/docs/cli/plugins/signing.html

Terraform has created a lock file .terraform.lock.hcl to record the provider
selections it made above. Include this file in your version control repository
so that Terraform can guarantee to make the same selections by default when
you run "terraform init" in the future.

Terraform has been successfully initialized!

(...)
(modules being created...)

Apply complete! Resources: 53 added, 0 changed, 0 destroyed.
To learn how to check that the installation was successful, visit the next section.
Digging deeper
Although it is not part of this workshop, it is recommended to store the state of the Terraform deployment on a backed-up backend.
By default, Terraform stores its state on local.
Run the next command to view the state file:
cat terraform.tfstate
This file describes the infrastructure that
is created after the terraform apply command is executed.
The next time you run Terraform, it will compare
the state file (real state) with the definition of the infrastructure (expected state)
and will make all the necessary changes for these two files to match.
This file is important, as it describes what’s the real status of your infrastructure. If this file is lost, Terraform will think the resources were never created. This will create some trouble. To avoid this, Terraform recommends keeping the state remotely.
There are multiples alternatives, like storing the state in S3.
Create an S3 bucket and name it
ssfc-terraform-stateand a key to access its contents.Add the next module information to the
main.tfyou created above:terraform { backend "s3" { bucket = "ssfc-terraform-state" key = "path/to/my/key" region = "us-east-1" } }Reapply the terraform manifest.
terraform apply --auto-approve