Don’t follow this steps if you already installed Sysdig Secure for Cloud with Terraform in the previous step.
Requirements
There are no requirements for this installer method.
Install
In the previous step we chosen AWS CloudFormation Template installation from the onboarding wizard. (If you skipped the wizard, just log into Sysdig Secure and browse to Integrations > Data Sources > Cloud Accounts, then click on Connect Account > AWS Mark all options Next Mark “Single” Next AWS CloudFormation Template ). Insert the AWS Account ID of the account you’d like to connect and click on Launch Stack.
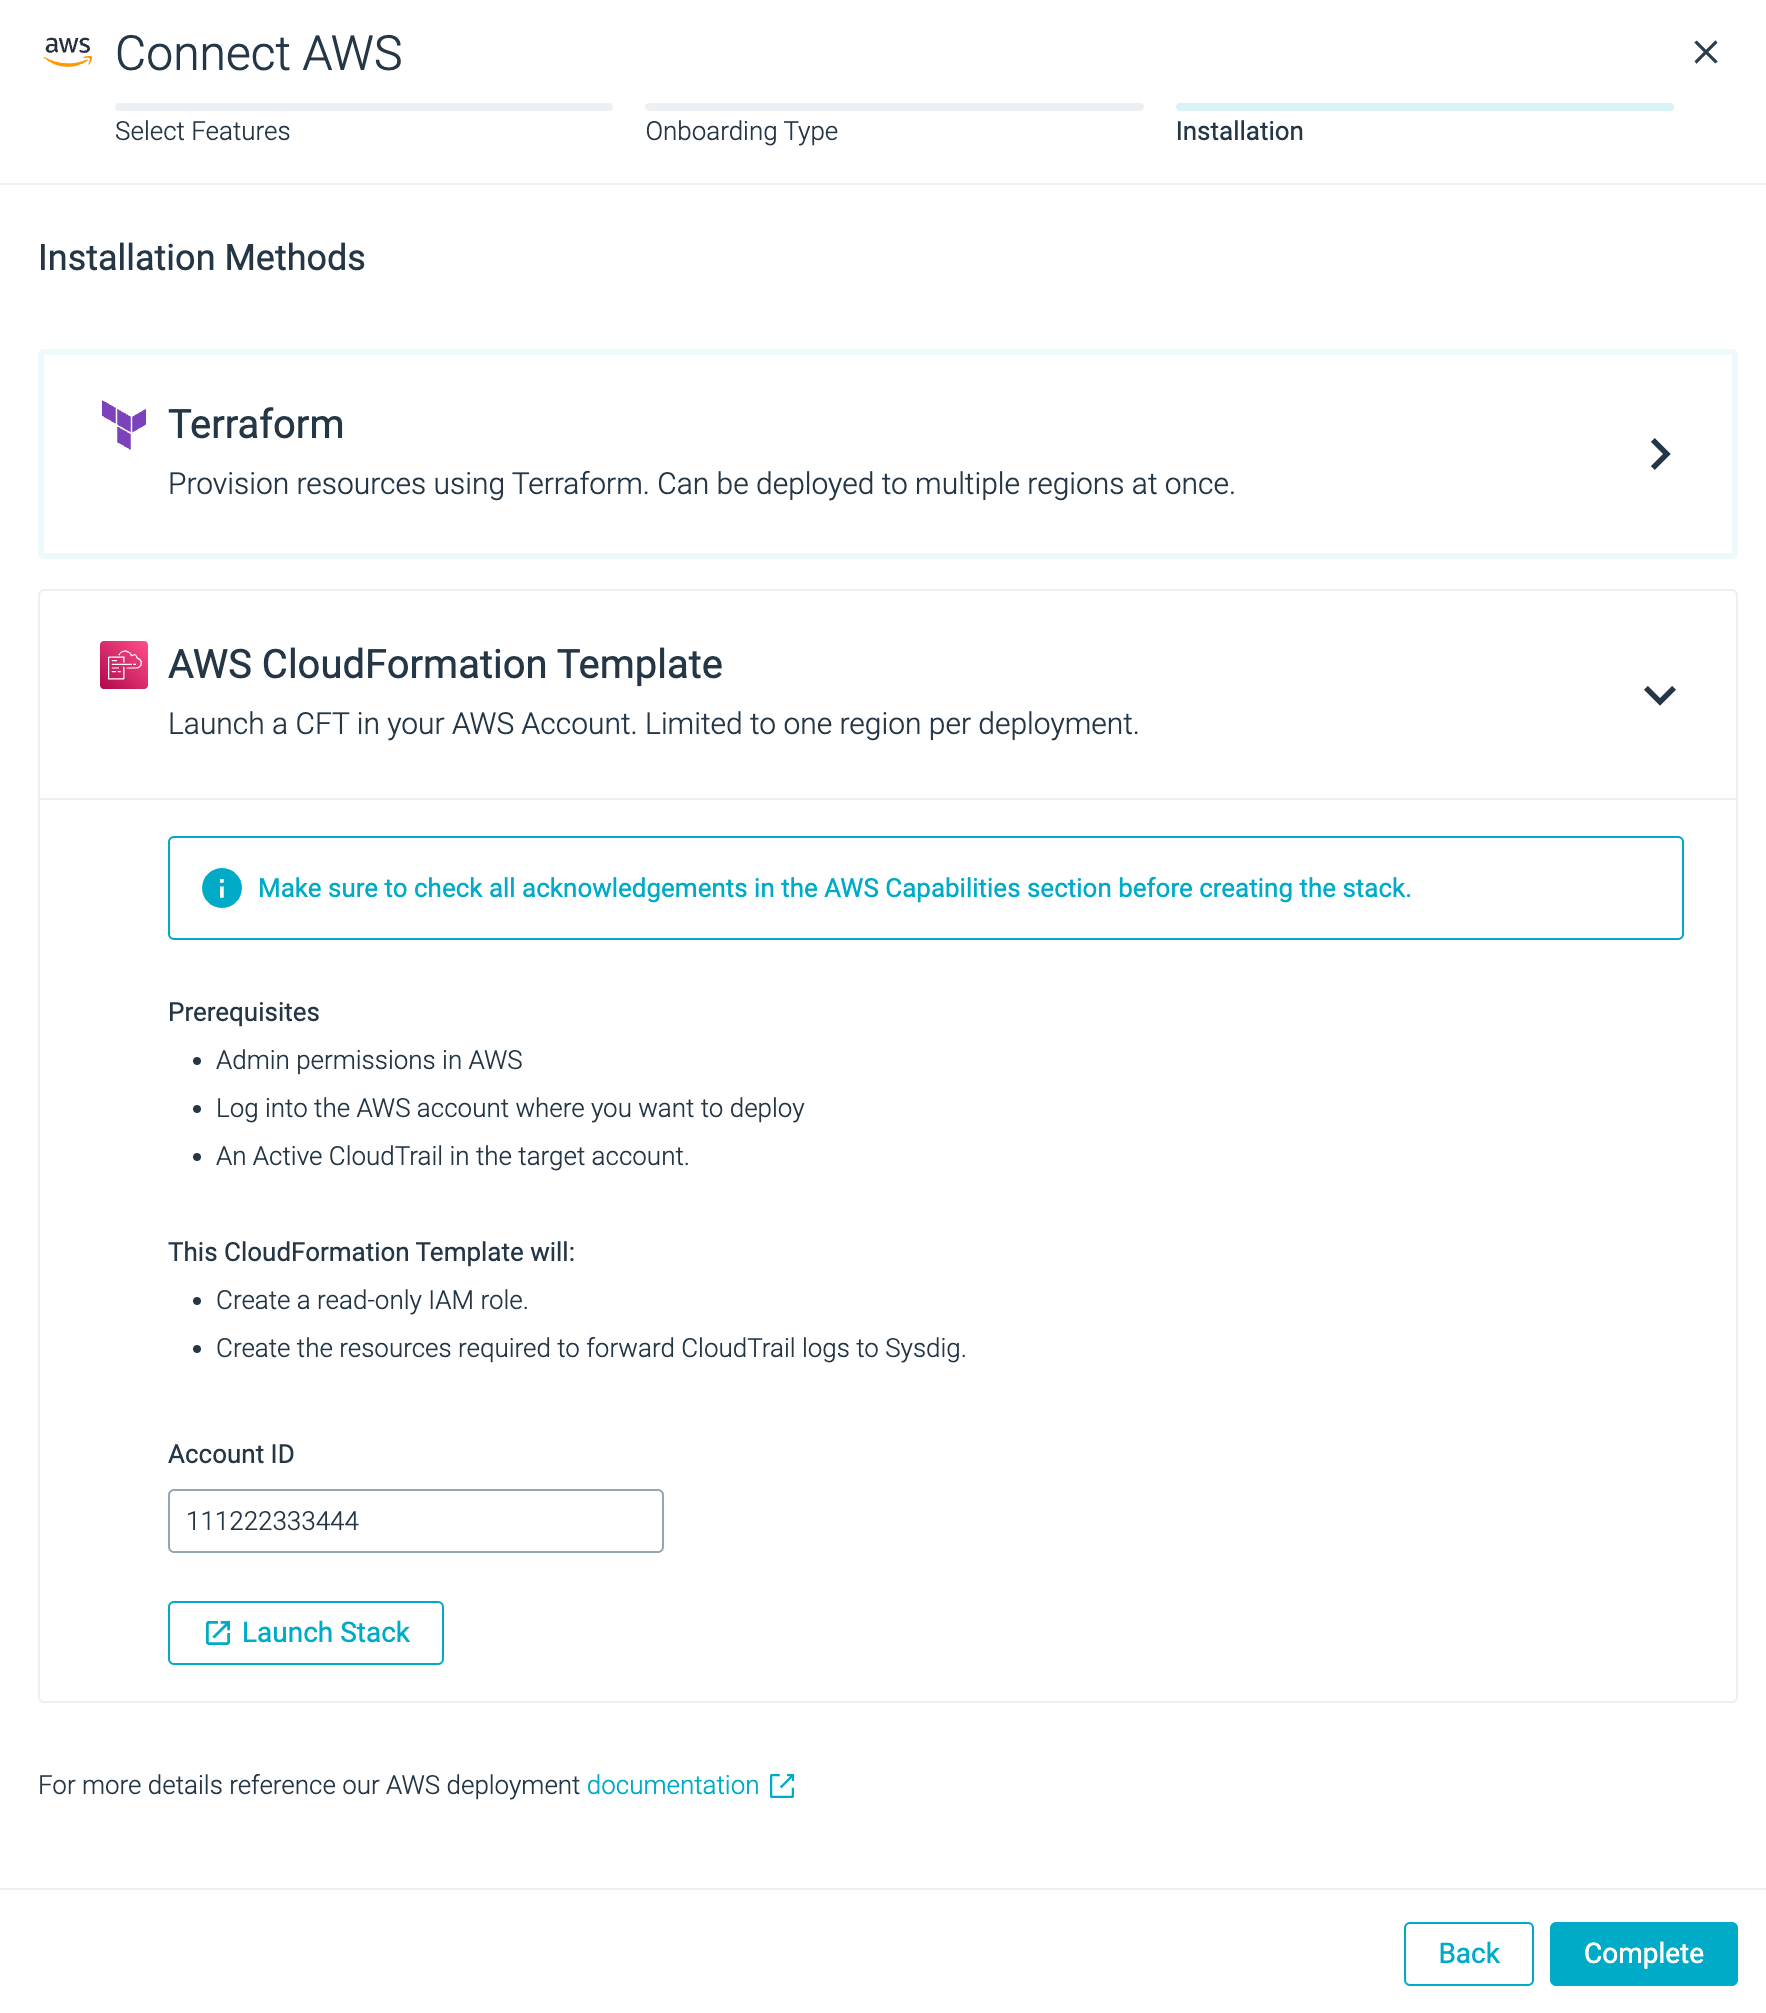
Make sure you switch to your desired AWS region for deployment of the associated resources. For the purposes of the workshop, make sure you’re in
us-east-1(i.e. ‘N. Virginia’).The AWS Console should open the CF Template:
- From the screenshot below: A. Change the “Stack name” string if you want a different name. B. Check tick box from the footer (acknowledge)

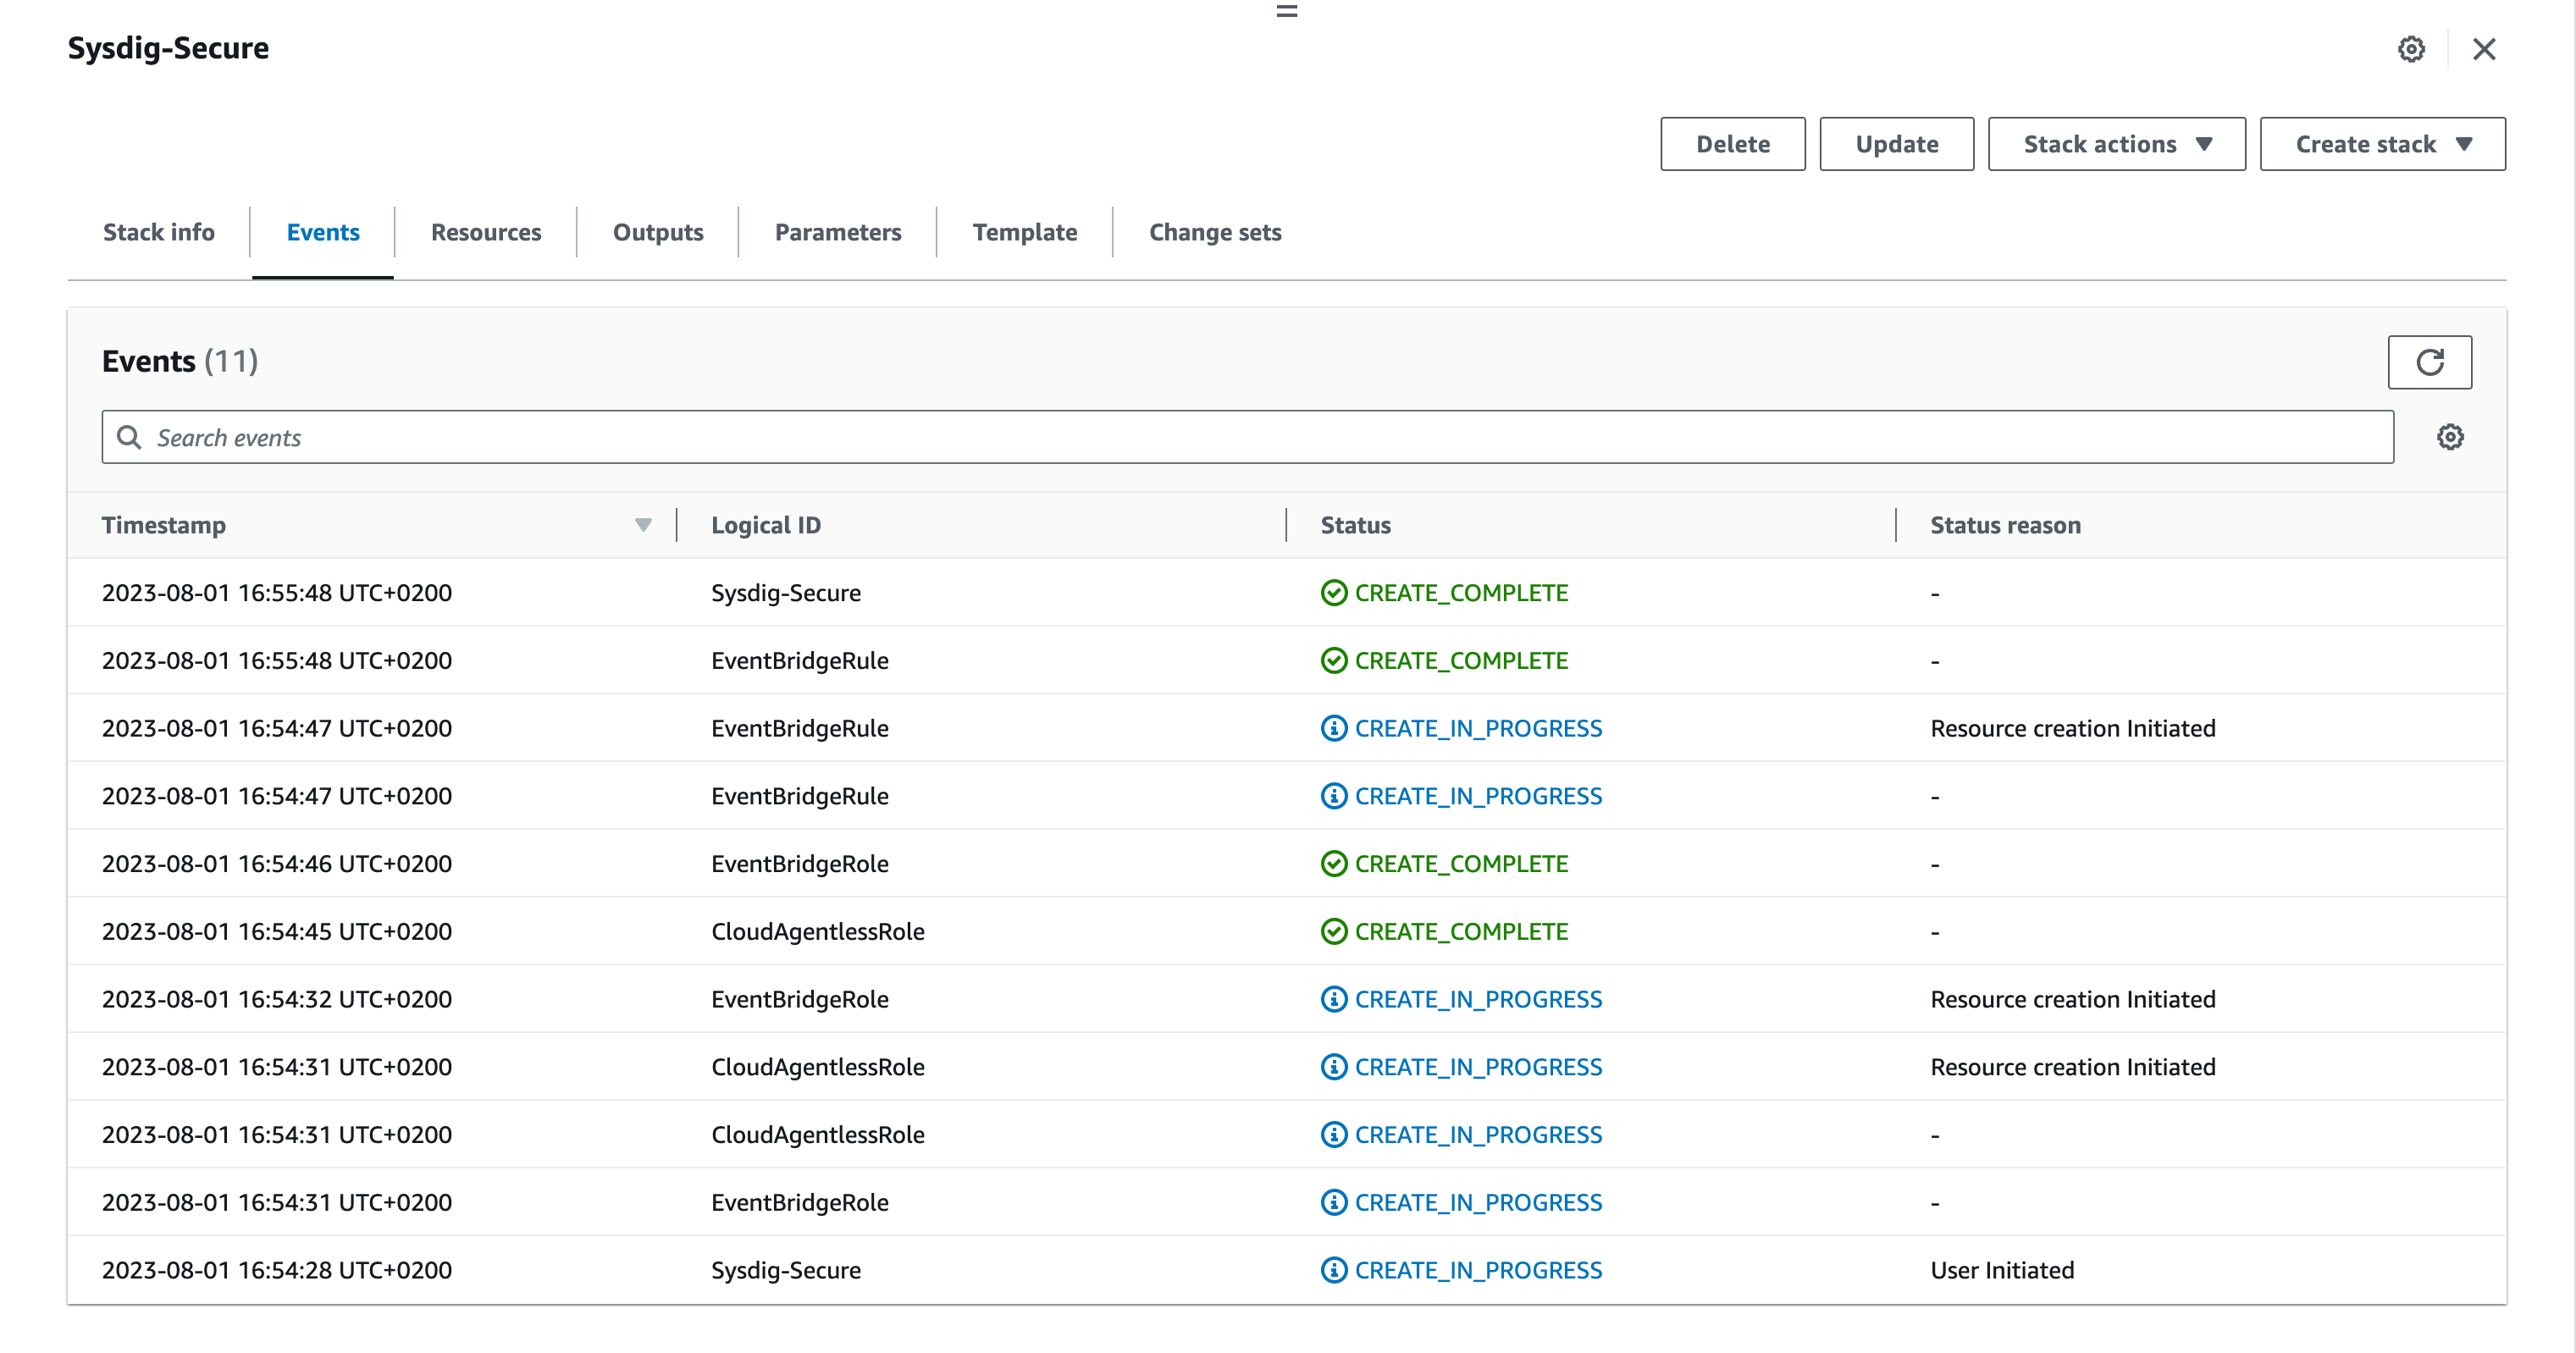
Click Create stack. You will first see the stack “Sysdig-Secure” in CREATE_IN_PROGRESS state. It will also start to create sub-stacks associated with the main one. Wait until the installation finishes.
Once completed, jump onto the next section to learn how to check that the installation was successful, go to Cloud Accounts Intall check section