Respond to an attack
Detection and Response
Configure a Runtime Policy
We are going to create a new policy to see how easy is to customize detection and response for our applications.
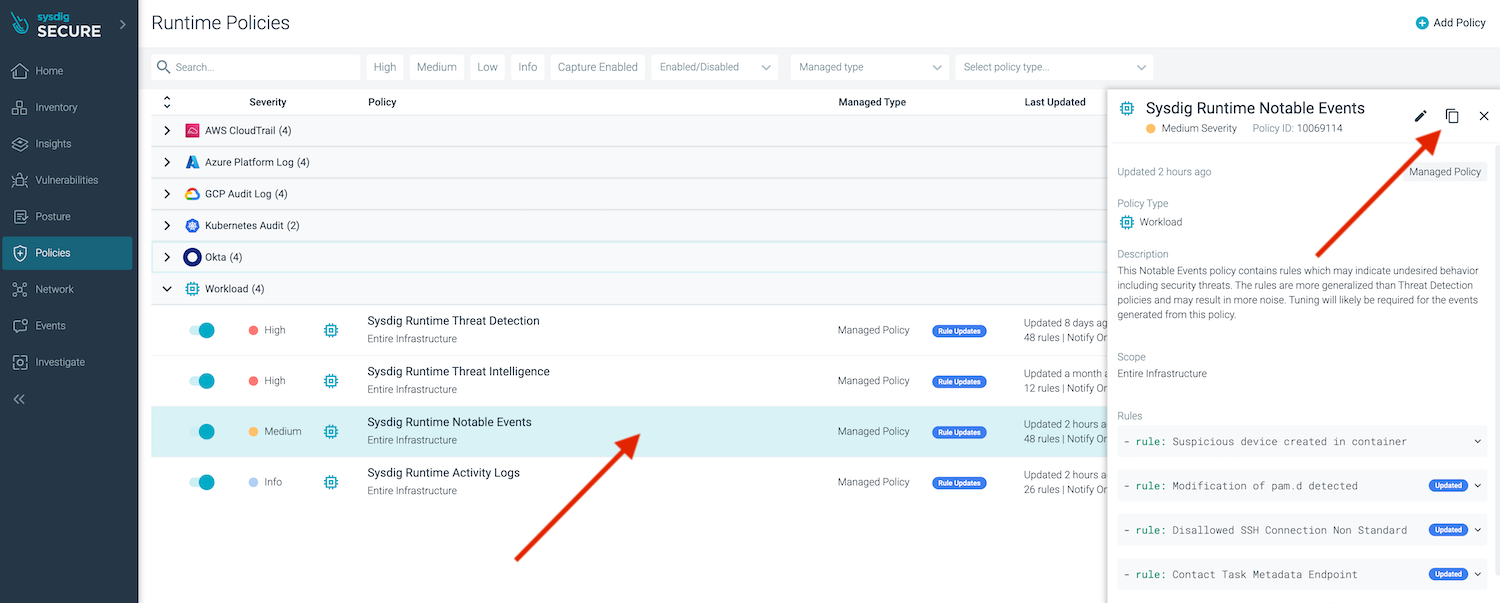
Browse to Policies > Runtime Policies, choose the Sysdig Runtime Notable Events policy, and click on the copy icon from the top right side.
Edit the new policy in order to customize what we want to automate.
Let’s increase the severity and customize the scope to container.name = bad-image AND kubernetes.cluster.name = <your-cluster-name> (please replace by the actual name of your cluster).

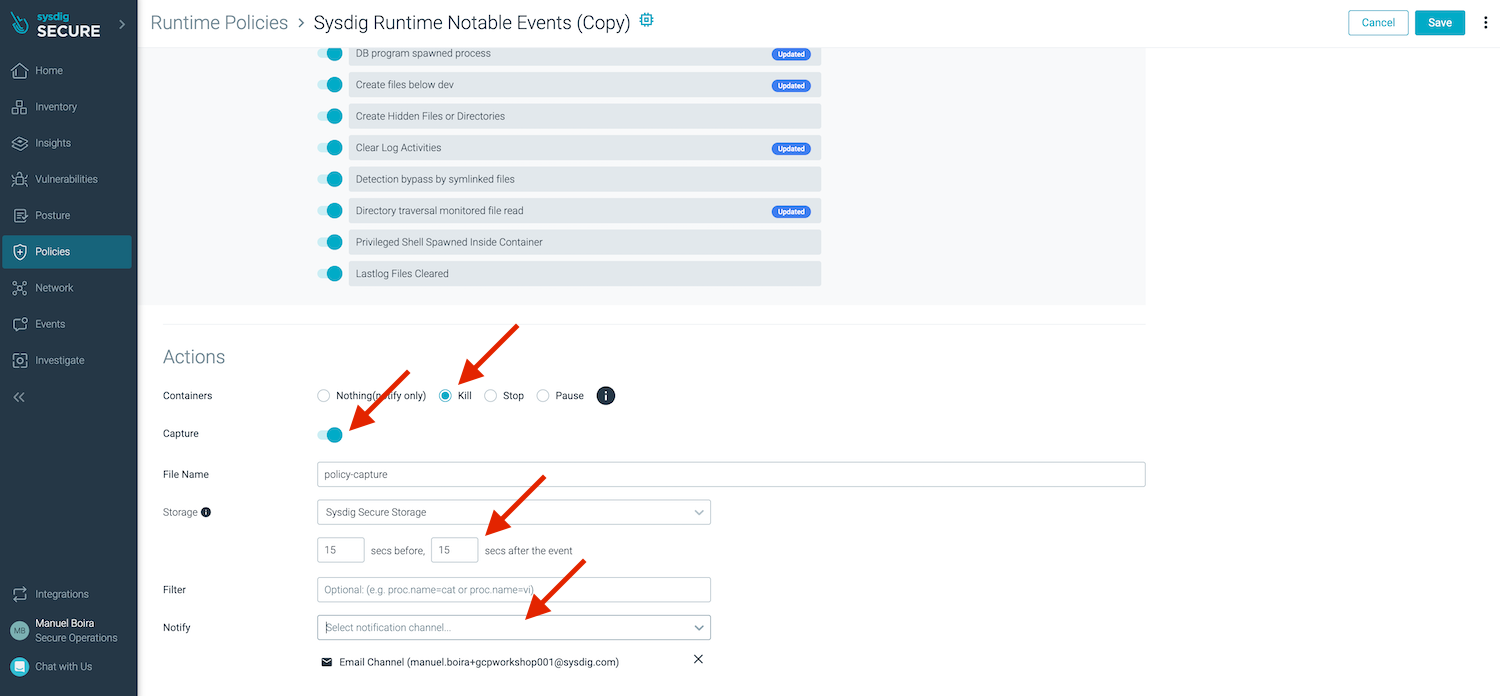
Scroll down to the bottom part to configure Actions.
Activate Kill Action, Capture, set 15 secs before, and add a notification to your e-mail address so that you can be alerted. Don’t forget to click the SAVE button.
To see it in action, we will try to repeat the “Shell Instrusion” scenario targeting the same container bad-image.
This time the container will be killed immediately. The attacker will only see an exit code 137 message.
user@host ~$ kubectl exec -t -i random-microservice-6dcd67cf8d-wpg59 -- /bin/sh
# command terminated with exit code 137
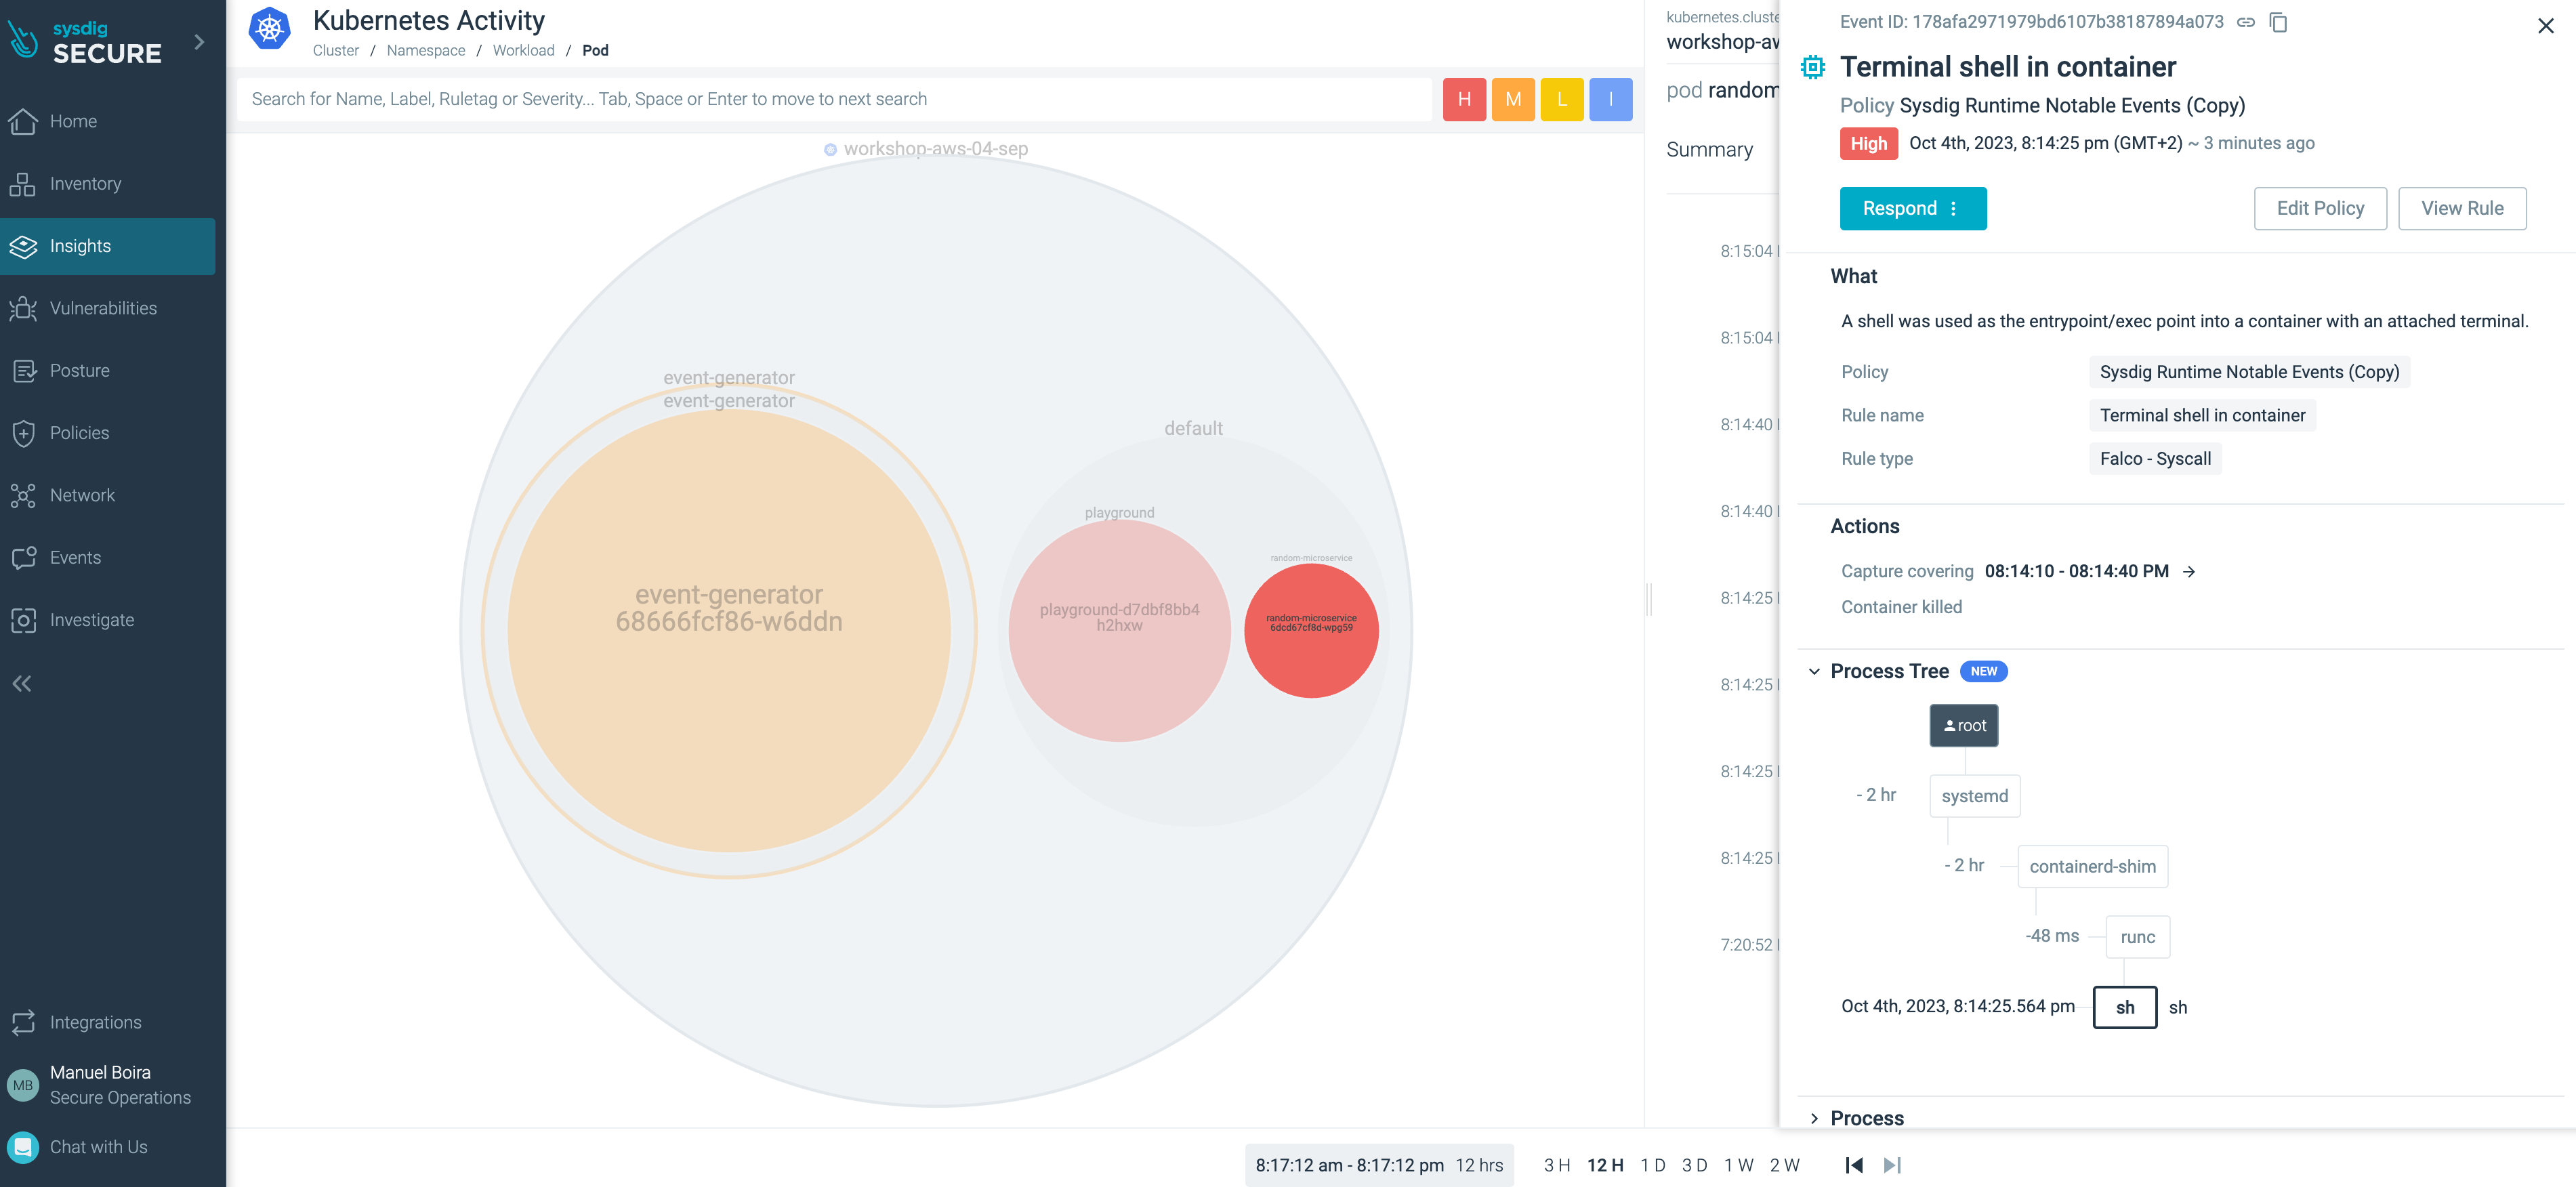
If we get back to Sysdig UI Insights > Kubernetes Activity and click on the event expanding its information, we will notice that:
- The new event this time is drawn in red colour, as we increased the severity of the new rule.
- Under the Actions section we can see that two things happened automatically
- Capture covering -
- Container killed
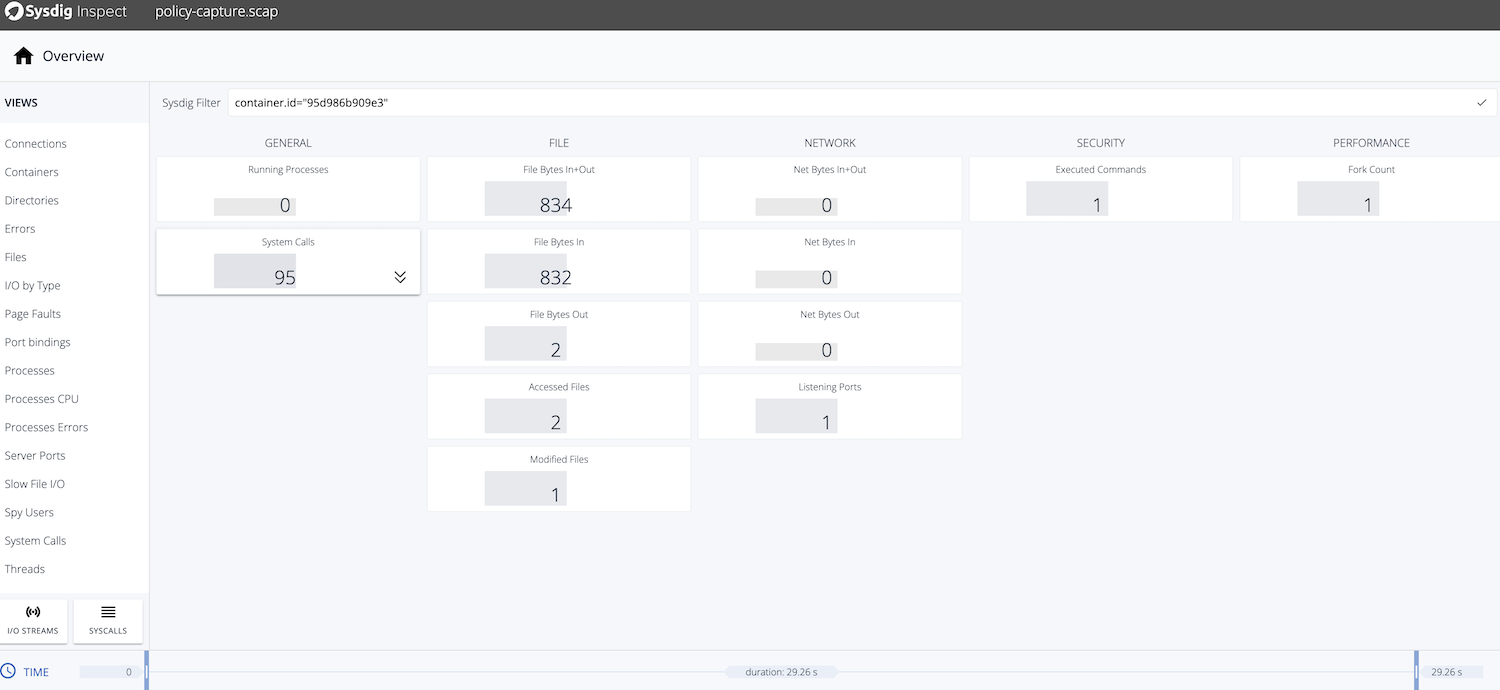
Let’s have a look to the capture that we configured to catch 15 secs before and after the event. Respond > View capture with inspect will lead us to the Sysdig Inspect screen where we can browse the capture in details.